
TL;DR
Start with the original download, calculate pixel requirements after cropping, and prepare a separate file for each print size. A sharp screen preview isn't proof of print quality: order one sample before producing desk photos, badges, or promotional materials.
A polished profile picture isn't automatically a print-ready photograph. Making printable photos from AI headshots means matching the image's actual pixels, crop, and facial detail to its physical destination, whether that's a desk frame, conference badge, or speaker handout.
Print-ready AI headshot: An AI-generated portrait prepared at the dimensions, resolution, file format, and color settings required by a specific printer or photo lab.
For professionals creating portraits with Looktara, the practical next step is planning the output before placing a print order. In 2026, a modern generation model still doesn't replace a careful print check.
Table of Contents
What makes an AI headshot suitable for printing?
An AI headshot is suitable for printing when its cropped pixel dimensions support the intended physical size, its facial details remain convincing, and its exported file meets the printer's requirements. Image dimensions matter more than a resolution label alone, because changing that label doesn't create additional detail.
Pixels, PPI, and DPI describe different things
Pixel dimensions: The image's width and height in pixels, such as 1200 × 1800.
PPI: Pixels per inch, which describes how densely those pixels are placed across a physical print.
DPI: Dots per inch, which describes a printer's output rather than the portrait's source detail.
For close-viewed photo prints, 300 PPI is a practical planning target, not a guarantee or universal requirement. The lab's instructions take priority. Required pixels equal print size in inches multiplied by the chosen PPI.
Calculated dimensions for common portrait prints
These dimensions are calculated at 300 PPI, rather than reported performance benchmarks. Sizes refer to the image area, not necessarily the full badge or printed document.
| Image area | Aspect ratio | Pixels at 300 PPI | Typical use |
|---|---|---|---|
| 2 × 2 inches | 1:1 | 600 × 600 | Square badge portrait |
| 2 × 3 inches | 2:3 | 600 × 900 | Small promotional insert |
| 4 × 6 inches | 2:3 | 1200 × 1800 | Desk photo or handout |
| 5 × 7 inches | 5:7 | 1500 × 2100 | Small framed portrait |
| 8 × 10 inches | 4:5 | 2400 × 3000 | Larger display portrait |
A file measuring 1200 × 1800 supports a 4 × 6-inch image at 300 PPI only if that entire image survives the crop. Trimming the sides or zooming toward the face reduces the available pixels.
A print file should be judged after cropping, not by the dimensions of its original download.
How can an AI portrait become a print-ready file?
- Download the original AI portrait rather than a screenshot.
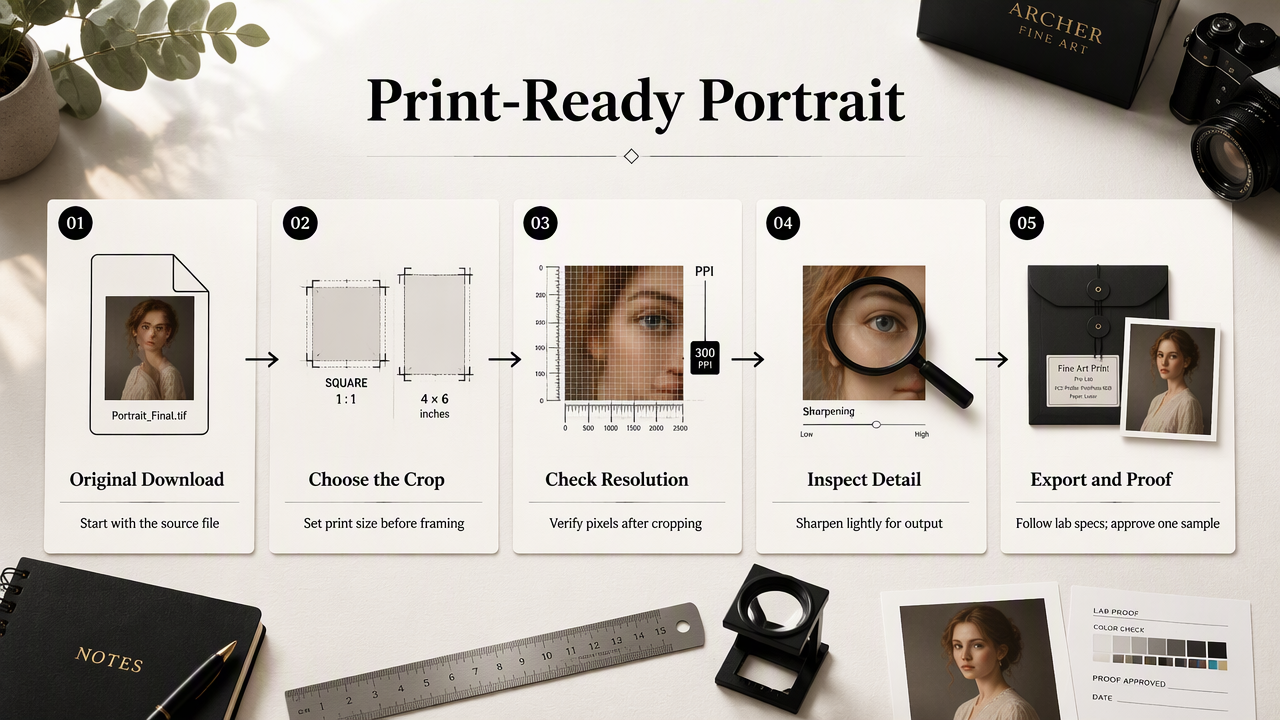
- Set the final print dimensions and crop ratio.
- Check the remaining pixels against the planned PPI.
- Inspect facial details and apply restrained output sharpening.
- Export using the lab's format and color instructions.
- Order one proof before approving multiple copies.
Crop for the frame, badge, or page layout
A square profile image won't fill a 4 × 6-inch frame without cropping, borders, or extra background. Choose the intended shape first, then position the face with comfortable space above the head and around the shoulders.
Conference badges need a different composition from desk portraits. A tighter crop can make the face easier to recognize at small sizes, while a speaker sheet may need room for adjacent text.
- Keep the eyes away from trim edges.
- Follow the badge template's photo window rather than its overall dimensions.
- Leave background space when a designer needs flexibility.
- Add bleed only when the print provider or layout template requires it.
Separate crops usually work better than forcing one export into every format.
Check detail before sharpening or enlarging
Inspect the image at full pixel size, paying attention to eyes, teeth, hairlines, ears, glasses, and clothing edges. Then review it at approximately its intended physical size. Those checks answer different questions: whether the file contains odd details, and whether those details affect the finished portrait.
Upscaling can increase pixel dimensions, but it doesn't verify identity or recover every missing detail. Enlarged files deserve another inspection, especially around eyelashes and textured clothing.
Apply modest sharpening after resizing. Strong sharpening can create pale outlines around hair or make skin texture distracting. The aim is clear facial detail, not a visibly processed finish.
Export for the provider, not for a generic preset
A high-quality JPEG is often suitable for photo-lab orders; PNG can suit workflows requesting lossless files. Neither format makes a soft source image sharp. For designed conference materials, a printer may instead require a print-ready PDF containing the portrait.
Use sRGB when the photo lab requests it. Convert to CMYK only when the commercial printer specifies that workflow and provides appropriate settings. Keep the original image and export a separate production copy.
Disable optional automatic corrections when the lab allows it and the portrait has already been edited deliberately. Record the selected settings so an approved proof can be reproduced.
When is a digital-only portrait unsuitable for print?
A digital-only portrait is unsuitable for print when the available file lacks enough usable pixels, contains visible identity errors, or conflicts with the intended document's photo rules. A flattering thumbnail can conceal defects that become obvious in a larger print or under close inspection.
Recognize cases that need a different image
Some portraits should be replaced rather than repaired. Warning signs include inconsistent eye shapes, invented accessories, unnatural teeth, and a likeness that differs noticeably from the person represented.
Official credentials require special care. Passport, visa, and regulated identification photos must follow the issuing authority's rules; a printable image isn't automatically an acceptable identity photo. Some workplace badges also require an actual photograph.
- Choose a smaller print when resolution is the only limitation.
- Select another portrait when facial structure looks wrong.
- Arrange photography when documentary accuracy is required.
- Check image-use rights before commercial reproduction.
Use a physical proof to judge the final result
A proof reveals issues that a bright display can hide, including dark shadows, muted colors, and distracting surface reflections. Evaluate it under the lighting where the finished photo will appear.
For a desk frame, compare the proof behind the intended glass. For badges, test the actual stock and sleeve. Approve the combination of image, paper, and finishing before ordering a batch.
How Looktara handles this
Looktara provides the AI portrait creation stage, while print preparation turns the selected digital portrait into an asset suited to a specific physical use. The most useful workflow starts with a clear destination: a professional desk photo, a conference portrait, or a small branded insert.
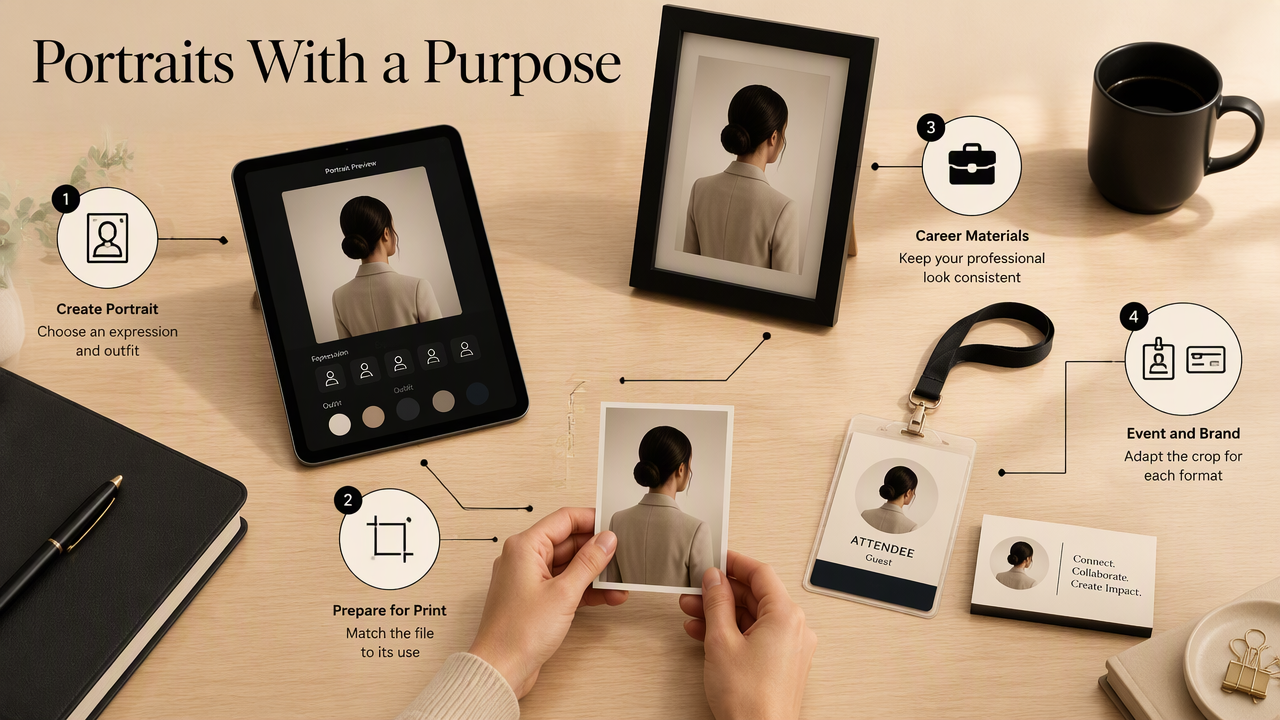
Choose a portrait around its professional purpose
For a fitness professional building consistent career materials, the fitness LinkedIn resume headshot generator is a relevant starting point for portrait creation. A recognizable expression and appropriate clothing can connect an online profile with an event handout.
Fitness business owners preparing author portraits for member communications can also explore the fitness newsletter resume headshot generator. The portrait can then be prepared separately for a printed newsletter's photo area.
Keep a simple production folder containing:
- The original portrait download.
- A crop for each approved physical size.
- The final export and its print settings.
- A record of the approved paper or print provider.
That separation preserves the source image while making repeat orders easier.
FAQ about printing AI-generated portraits
Printing decisions depend on the final image area, the downloaded file, and the provider's production requirements.
Can a 1024 × 1024 AI headshot make a 4 × 6 print?
A 1024 × 1024 image can be printed at 4 × 6 inches, but filling that rectangle requires cropping or adding borders. At 300 PPI, the uncropped square measures about 3.4 inches per side. A larger output may still be acceptable at a lower pixel density, but a physical proof should decide.
Does changing the file to 300 DPI improve image quality?
Changing a resolution label to 300 DPI doesn't add detail when the pixel dimensions remain unchanged. The relevant calculation is pixels divided by printed inches. Resampling creates additional pixels, but those pixels are estimated. The better approach is checking the original dimensions, choosing a realistic print size, and inspecting the result.
Which paper finish works best for professional portraits?
Matte or lustre finishes are practical options for portraits handled often or viewed under office lighting. Glossy paper can produce a different visual effect but may show reflections. The best choice depends on the display, lighting, and provider's paper options. A sample on the intended stock is more useful than a screen preview.
Conclusion
Creating printable photos from AI headshots works best as a small production task: select the portrait, calculate the cropped dimensions, export to the provider's requirements, and approve one physical proof. For a new professional portrait, explore Looktara at looktara.com, then prepare a dedicated print file for the first desk photo, badge, or promotional order.
Generated by EarlySEO.com