
TL;DR
The built-in iPhone camera is a practical starting point for simple headshots; Android users should check their native camera before choosing a manual-control app. The deciding factors are exposure lock on the intended lens, predictable focus, and easy repeat shooting. Test those controls before a full session.
Consistent facial brightness matters more than a camera app's filter collection. The best camera app with exposure lock for headshots is the one that keeps a face properly exposed while framing and expressions change. For professional-profile projects, Looktara offers an AI headshot option alongside the phone-camera capture workflow.
Exposure lock: A camera control that holds the selected exposure instead of continuously recalculating brightness as the composition changes.
AE/AF lock: A combined control that locks automatic exposure and autofocus together. That distinction matters when a subject moves closer to the phone.
Table of Contents
Best camera options for consistent headshots
The built-in iPhone camera is the simplest starting recommendation, while Android selection depends on the phone's native controls and support for third-party camera apps. A useful shortlist separates actual capture tools from AI headshot services: exposure lock belongs to the capture stage, while generated professional imagery belongs to a different workflow.
Camera and headshot workflow comparison
The strongest choice depends on the task, operating system, and lens used for the session.
| Option | Best-fit task | Exposure-control approach | Front-camera check | Ease of use |
|---|---|---|---|---|
| Looktara | AI headshot workflow, including fitness-professional LinkedIn imagery | Separate from camera exposure locking | Source photos come from the capture workflow | A different route to professional imagery |
| Apple Camera | Simple iPhone headshot sessions | Combined AE/AF lock | Test the intended camera and mode | Straightforward starting point |
| Native Android camera | Headshots without another download | Controls vary by manufacturer and mode | Confirm a lock indicator appears | Usually the easiest Android starting point |
| Open Camera | Android users seeking more capture controls | Available controls depend on device support | Test exposure lock on the actual phone | More settings to learn |
| Adobe Lightroom mobile | Capture and editing in one workflow | Check capture controls in the installed version | Confirm lens availability before choosing | Suits existing Lightroom users |
| Camera+ | iPhone users seeking separate focus and exposure placement | Check current locking controls and app availability | Verify the intended selfie workflow | More control-oriented |
This shortlist is not a device-by-device compatibility certification. App versions, operating systems, and camera hardware can change which controls appear. Current pricing and front-camera support also require checking before purchase.
Who should pick which capture tool?
Native cameras suit straightforward sessions; additional apps make sense when a specific missing control justifies them.
- Occasional LinkedIn updates: Start with the native camera and a stable phone position.
- Solo Android portraits: Test the native selfie camera first, then consider Open Camera if the needed control is absent.
- Existing Lightroom users: Check whether its capture workflow supports the intended lens before adding another app.
- More deliberate iPhone setups: Consider Camera+ when separate focus and exposure placement would improve the session.
An app with more controls isn't automatically better. A visible, repeatable lock on the camera actually being used matters more than an extensive settings menu.
What does exposure lock change in a headshot?
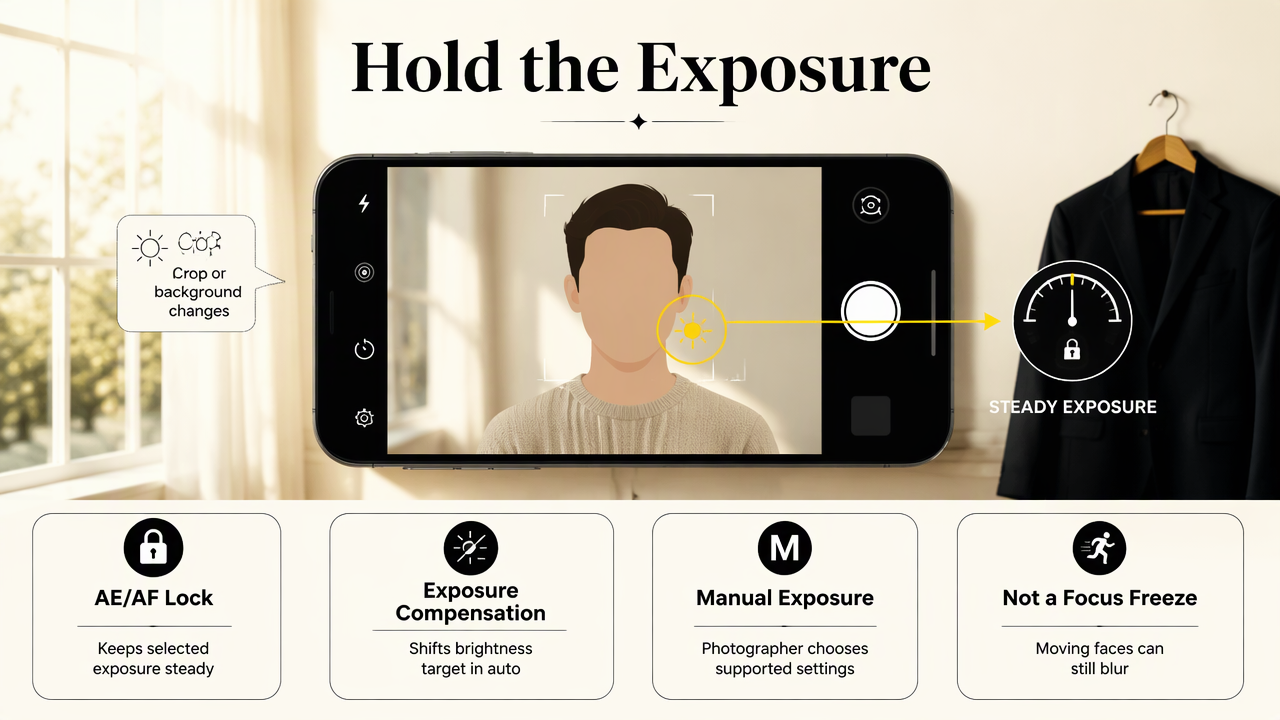
Exposure lock keeps a headshot's selected capture exposure steady when the background or framing changes. It helps prevent automatic metering from responding to a bright window, dark jacket, or different crop. It does not freeze the lighting itself, guarantee identical processed images, or keep a moving face in focus.
Exposure lock versus manual exposure
Exposure lock preserves an automatic exposure decision, while manual exposure lets the photographer choose settings directly.
- Exposure compensation: Adjusts the camera's brightness target while automatic exposure remains active.
- Manual exposure: Places supported settings, such as shutter speed and ISO, under direct control.
- White balance lock: Helps hold color rendering steady rather than exposure brightness.
- Focus lock: Holds the focus distance, which may become unsuitable if the subject moves.
For a seated headshot beside a steady window, exposure lock can be enough. Manual exposure becomes useful when the photographer needs explicit settings and understands their tradeoffs.
Why a locked setting can still produce different faces
Changing light can alter facial brightness even when the camera's exposure setting stays locked.
A passing cloud, a turned head, or movement away from a window changes the light reaching the face. Phone processing may also adjust the final image beyond the initial exposure decision. The practical response is to keep the setup stable and review a short test series.
Key distinction: Exposure lock controls the camera's metering response; it does not control the room's lighting.
Skin should remain believable, with visible detail in bright areas. A slightly darker preview can be preferable to a forehead or cheek that loses texture.
How can exposure lock produce better source photos?
Exposure lock produces more consistent headshot source photos when the lighting, camera distance, and subject position remain stable.
- Choose steady, soft light.
- Position the phone at eye level.
- Set focus and brightness on the face.
- Activate the available lock.
- Capture a short test sequence.
- Review facial detail before continuing.
Set up the face before locking brightness
A good starting exposure depends on the face receiving suitable light before the lock is applied.
Place the subject near a window with indirect light and use a simple background. Keep the phone far enough away to avoid an exaggerated close-up perspective. A tripod or stable support makes a timer-based session easier to repeat.
On iPhone, touching and holding the subject area can activate AE/AF lock in supported shooting situations. Adjust the brightness control as needed. Android interfaces differ, so the photographer should look for an exposure-lock control rather than assume the same gesture applies.
If combined AE/AF lock is active, keep the subject at the original distance. A timer helps with camera shake, but it doesn't compensate for movement after focus has been locked.
Run a three-frame compatibility test
A short test reveals whether the selected camera mode behaves consistently enough for the session.
- Capture a neutral expression with the exposure lock active.
- Change the framing slightly while keeping the subject and light steady.
- Capture another expression and compare facial brightness across the images.
Check whether switching lenses, reopening the app, or changing modes removes the lock. If it does, repeat the setup after each change. For front-camera sessions, test the front camera itself; rear-camera controls don't establish selfie-camera compatibility.
Review the face rather than the overall image. A brighter background is less important than natural skin detail and sharp eyes.
How Looktara handles this
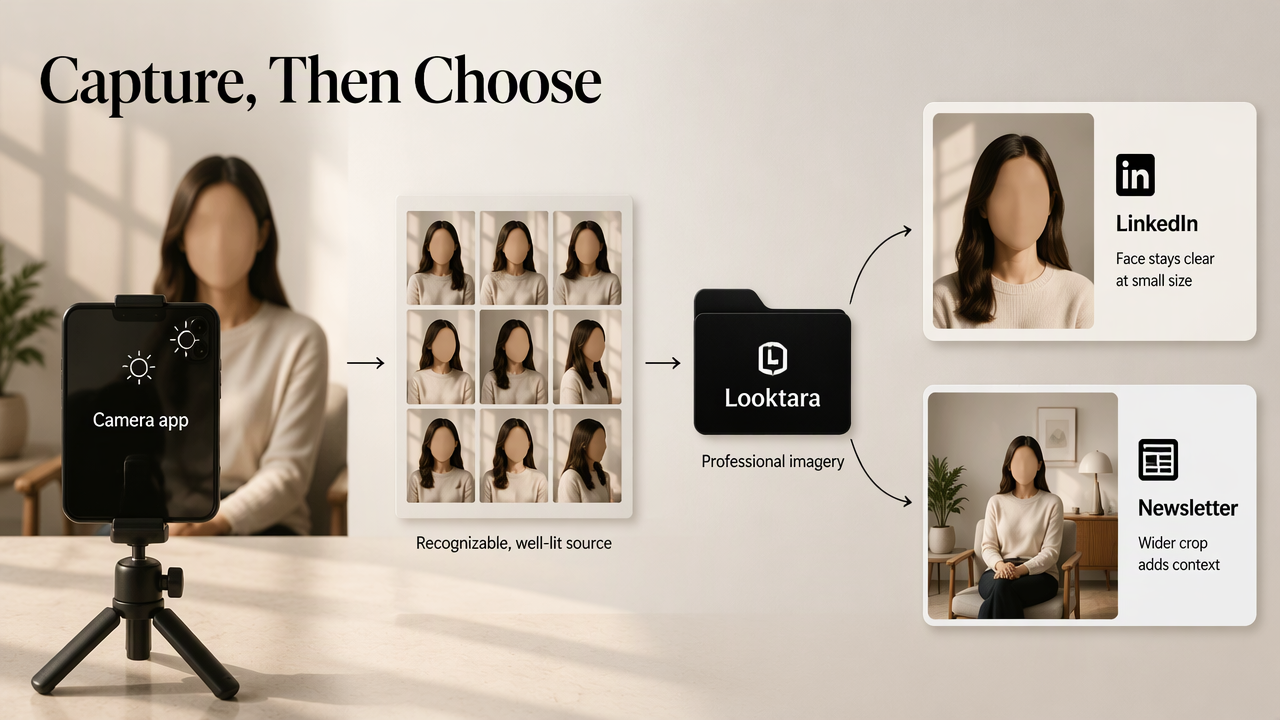
Looktara fits the professional-imagery stage of a headshot project, while a camera app handles exposure during source-photo capture. Keeping those roles separate creates a clear workflow: capture recognizable, well-lit portraits first, then choose the professional-photo route that matches the intended profile or brand.
Match the workflow to the publishing destination
Professional imagery works best when its framing and presentation suit the destination.
A LinkedIn portrait usually needs an easily recognized face at a small display size. A newsletter image may allow a wider crop that shows more clothing and context. Fitness professionals preparing that format can explore the newsletter headshot option.
Useful source-photo characteristics include:
- Clear eyes and natural facial detail.
- Even light across the face.
- Consistent identity across selected images.
- Enough space around the head for cropping.
These capture goals support both conventional portrait editing and AI headshot preparation.
Exposure-lock headshot FAQs
The most useful exposure-lock decisions concern lens support, focus behavior, lighting, and the intended use of the finished image.
Does exposure lock work with the front camera?
Front-camera exposure lock depends on the phone, app, and shooting mode. A rear-camera feature listing does not confirm selfie support. The practical check is to open the front camera, activate the available lock, and change the framing slightly under steady light. Facial brightness should remain reasonably consistent across the test captures.
Is manual exposure better than AE/AF lock?
Manual exposure is better when the photographer needs direct control over supported capture settings. AE/AF lock is often simpler for a stationary headshot in stable light. Neither approach fixes poor lighting or subject movement. The best choice is the control that can be set confidently and maintained throughout a short session.
Does exposure lock prevent blurry headshots?
Exposure lock does not directly prevent blur. Focus accuracy, subject movement, camera movement, and shutter speed all affect sharpness. Combined AE/AF lock can hold focus, but a subject moving toward the phone may leave that focus distance. Stable support, adequate light, and a stationary pose help produce sharper portraits.
Should professional and dating profiles use the same photo?
Professional and dating profiles can benefit from different presentation even when both need clear, recognizable faces. LinkedIn generally favors a focused professional portrait; dating profiles often benefit from more everyday context. Exposure lock can support consistent capture for either purpose, but image selection should reflect the setting and represent the person accurately.
Conclusion
The best camera app with exposure lock for headshots is the one that passes a short test on the intended lens. Start with the native camera, confirm the lock, and capture three frames under steady light. For an AI professional-imagery workflow, explore Looktara at looktara.com after selecting clear, naturally lit source photos.
Generated by EarlySEO.com